"Why in the world did you pick this name for your blog?" ...so glad you asked...

Tuesday, April 29, 2014

The Perfect Party Dress = The Perfect Piano Recital Dress

If you have seen any of the other Tie Dye Diva blog hop posts, you have probably already gotten lots of great ideas on how you can alter the Perfect Party Dress to suit any occasion.
I have to apologize up front because I think most of the other bloggers are going to show you how to acheive the look they did and I am not going to be able to do that to the extent that others have done.  I had already made the dress I'm featuring before this blog hop was organized, so I didn't take any step-by-step photos or measurements.
Hopefully, you can still glean some ideas from what you see and what I say.

Here is the dress I made for my 4-year-old daughter's graduation recital where she played Twinkle, Twinkle Little Star and three variations on the theme.  If you have a music student doing the Suzuki Method, you are familiar with this first milestone.


As quickly as I can explain it, here are the changes I made to the pattern:

I shortened the bodice.

I made layered flutter sleeves. (Just a straight line on one side the length of which I got from measuring the armholes.  And a curved line for the outside of the sleeve, which I finished with a baby hem.)

Instead of the sash, I folded a strip of fabric and sewed it into the seam where the skirt attaches to the bodice.  I just made a bow and tacked it on the front with some handsewn stitches.

I made the skirt a hi-lo skirt and then made up the difference with another layered ruffle in the front and just the single orange ruffle in the back.


Here she is recieving her trophy for her Twinkles.  Her lovely teacher got down on her knees for a photo op.  :)

You can't see the fabric very well, but I tried to tie it in to the occassion.  The blue has little stars, the multi-colored is diamonds ("like a diamond") and the orange has tiny planets and rockets on it. 

I know the fabric choice has nothing to do with the pattern, but the fact that I chose this pattern to make this dress for such an important moment in my young girl's life speaks to my regard for this     pattern. 

It is adorable if you only use it with the two main options Jen has provided, but if you even feel yourself wanting to try out something a little different, the basic shapes of The Perfect Party Dress and the comfortable fit make it a great pattern to have in your stash.  And right now, I hear the price has been reduced to celebrate all you blog hoppers!
You can use my affiliate link to get over to the Tie Dye Diva store right now and get your creativity flowing.

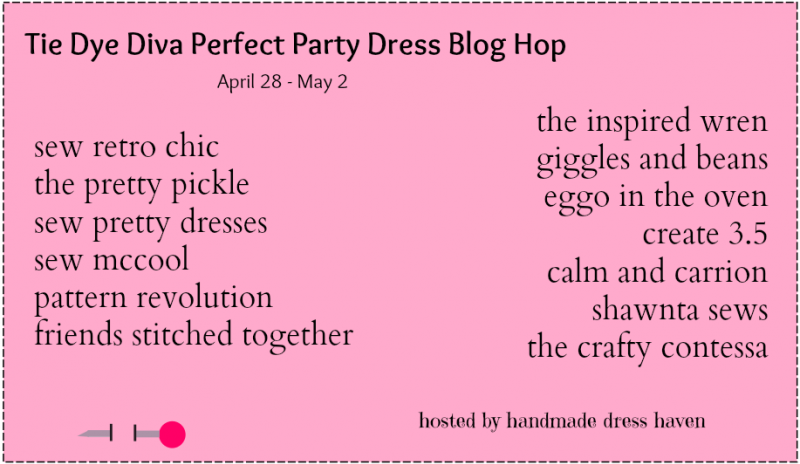
Tie Dye Diva Perfect Party Dress Blog Hop


I've told you about Tie Dye Diva patterns before and I'm sure I'll mention them again, but this is a particularly super-great reason to bring them up.  It's a blog hop, y'all!

The thing I love most about a blog hop is that you get to hear a lot of different perspectives on a pattern and you get to see a lot of different pictures of makes from the pattern.  This blog hop is particularly cool, in my opinion, because when I was asked to join, I was told that our goal was not just to make The Perfect Party Dress, but to use the pattern in a unique way.  So, not only do you get to see a lot of Perfect Party Dresses, you get to see how versatile this pattern truly is.  If you like to fiddle around with patterns and change them to match your vision or maybe DIY a dress you saw in a store or catalogue, this is a well-drafted starting place to make your vision into a reality.

Here are some of the variations I have made.


It's my turn tomorrow.  Come back then to see how I made The Perfect Party Dress my own.

HTML Map

This post contains affiliate links.  I can vouch for the quality of Tie Dye Diva patterns and I feel totally confident you will be happy with any purchase from her wide selection of patterns.

Thursday, April 24, 2014

The Conclusion of Easter Sewing

Well, the sad conclusion is that I do not yet have the skills needed to sew a nice looking wool coat.  I really wanted to make each girl a coat from lavender herringbone wool with a pink crepe-backed satin lining, but there were too many hiccups along the way and I don't have the knowledge base or skills to fix everything that wasn't quite working.  I got about 3/4 of the way done with one and had to stop in tears.  I went back the next day with resolve to go ahead with the lining and make it work, but the more I worked on it, the more little trouble areas I ran into and the more home-sewn it was starting to look.

I wanted to make them coats that would be beautiful and durable to last a couple of Falls and Springs, but it wasn't meant to be.
I haven't had a failure that has gotten me down quite this much in a while.

Enough of the pity party and on to some pretty pictures of what DID get finished and worn.


I like my girls to coordinate but not to be twinsies, so I used fabric from the same line (Glitz by Michael Miller) in two different prints.
I used the same basic pattern but altered it a little differently for each dress.


For my dress, I used Simplicity 2584, now out of print.  I bought barely enough Amy Butler rayon challis at Hawthorne Threads several months ago on sale.  I widened the bottom half into a bit of an a-line shape because I didn't want to feel restricted in a shift dress.  I wanted an easy-to-wear casual dress where the pretty print could be the star.  Unfortunately, since I didn't do the yoke in a solid color or add piping around the edges or something else to deliniate the edges, the pretty shape of it is lost in the print.


I used my embroidery machine to make lambs for my girls' Easter baskets and they carried them around that whole day and slept with them and have been playing with them ever since.  GREAT investment in a $10 pattern.


So, of course, we had a happy Easter, even without beautiful lavender coats with pink lining.  


Saturday, April 19, 2014

Me-Made-May 2014


It's on y'all!  I'm so excited that Zoe is hosting Me Made May again! If you are not familiar with this phenomena, you can read all about it on on Zoe's blog.
 I don't know exactly why I get so excited about it, but part of it is seeing more outfit posts than usual and being inspired by fabrics and patterns and part of it is the extra boost of encouragement I get by people stopping by on Flickr to say they like my sewn items.


Here's my pledge (not unlike last year's)

I, Sara Upshaw of The Pretty Pickle, sign up as a participant of Me-Made-May '14. I endeavour to wear one hand sewn item, whether bag or clothing, each day for the duration of May 2014.

I joined the Flickr group and followed the Pinterest board.  Hope to see you there!


Tuesday, April 15, 2014

Sewing With Easter In Mind

I've got big plans this Easter and it's getting down to the wire with very little time to finish.
I should probably be sewing instead of blogging about it... so I'll make it short.

I'm using the Glitz line by Michael Miller (and I know I'm not the only one) for my girls' dresses.


Not only are they each getting a dress, but the plan is for each of them to have a lavender coat with blush pink lining as well.  I'm using a vintage pattern that has really been a pleasure to sew.  I even did the interfacing as it instructed out of reverence to the awesomeness of vintage.


I'm 3/4 of the way done with my own dress for Easter as well.  I cut into my prized Amy Butler challis and only had scraps left over after very imaginative cutting.  I'm using an OOP Simplicity pattern with a great yoke detail on the front that I'm afraid I wasted by not adding some piping or using a contrast fabric.  Oh well.


Already completed for my girls are some t-shirts that are a collaboration between me and my dear friend Gifton Gammon, who is also the graphic designer for all things Molly Blossom (my pattern company).  I had an idea to combine bunnies and Christ's ressurection and she made it happen with a happenin' design.  I printed a yard of these vingettes on Spoonflower and made shirts available for sale as well.  


The shirts are all winging their way to their new homes now, but I think I'll offer them again next year.  I just love the meaning behind this super-cute design.

Alright, back to sewing, or my visions for Easter dress perfection won't be realized.


Thursday, April 3, 2014

A New Space

We moved last weekend and we are trying our best to find a place for everything and put everything in a place in our new rental.  Good news:  there's a finished basement where there is plenty of room to spread out my sewing stuff.  Bad news: unpacking and organizing is slow going with two little ones and my sewing mojo is waning.

Here is what my sewing space looks like currently.


It will still not be the cutest thing ever when it's finished because we are just renting and we are trying to save money right now after all the moving expenses.  When we get our own house and have a bit more cash flow, there will be cute rugs, paint and more organizational furniture involved.  I'm just glad to have plenty of space.


I just discovered that Kids Clothes Week, the challenge where you sew one hour a day for seven days for your kids, begins next week.  I signed up today to try to give myself a reason to get things organized quickly so that I can devote some time to sewing and not be consumed by unpacking.

I have a few things already planned that I can go ahead and cut out in my down time to make and I also have at least four previously cut things still waiting for someone to put them together.

kid's clothes week

You should go check out the KCW blog.  There's tons of inspirational posts about patterns, color, spring, and other stuff to get your wheels turning as well as GIVEWAYS!